
Getting Started - Create a New Contact
TABLE OF CONTENTS
Still have questions? Contact [email protected]
Create New Contact
Let's dive right in by adding your very first contact. Establishing your network starts with this simple step:
Navigate to Contacts in the main menu.
Click the Add Contact button.
Enter the contact details (name, email, phone, etc.). Remember, the more information you provide, the easier it will be to personalize your engagements. If you don't see the contact field you need to add information to, use the Create New Custom Field checklist.
Click Save


Did you know? When a Form or Survey is filled out by a new lead, a new contact is automatically created!
Edit Existing Contact
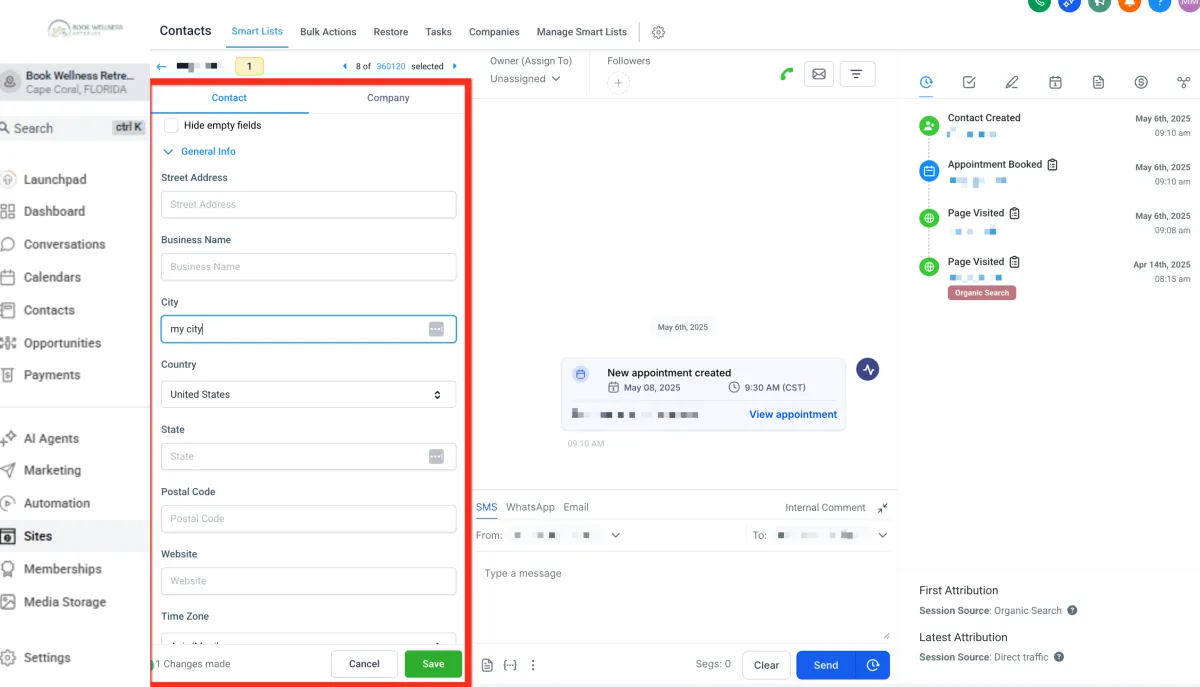
Keep your contact information current and accurate. Editing contacts is quick and straightforward, ensuring your data stays up-to-date:
Navigate to Contacts in the main menu.
Click the Add Contact button.

3 Enter the contact details (name, email, phone, etc.). Remember, the more information you provide, the easier it will be to personalize your engagements. If you don't see the contact field you need to add information to, use the Create New Custom Field checklist.
Delete an Existing Contact
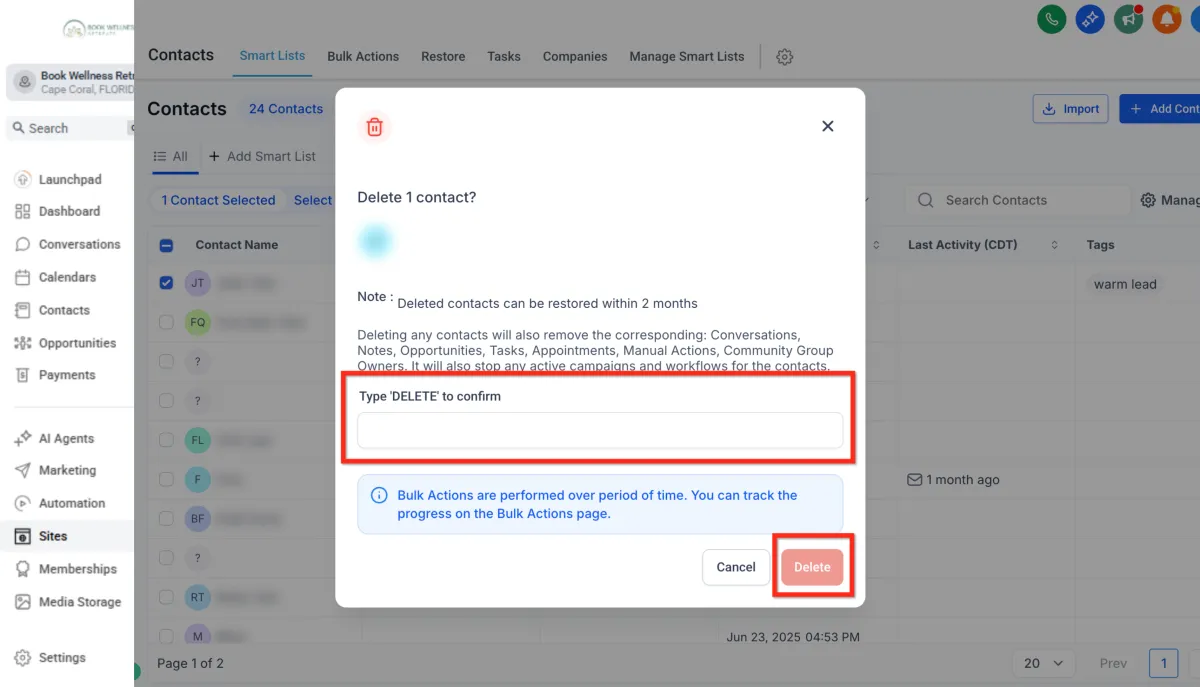
Deleting any contacts will also remove the corresponding: Conversations, Notes, Opportunities, Tasks, Appointments, Manual Actions, Community Group Owners. It will also stop any active campaigns and workflows for the contacts. Deleted contacts can be restored within 2 months
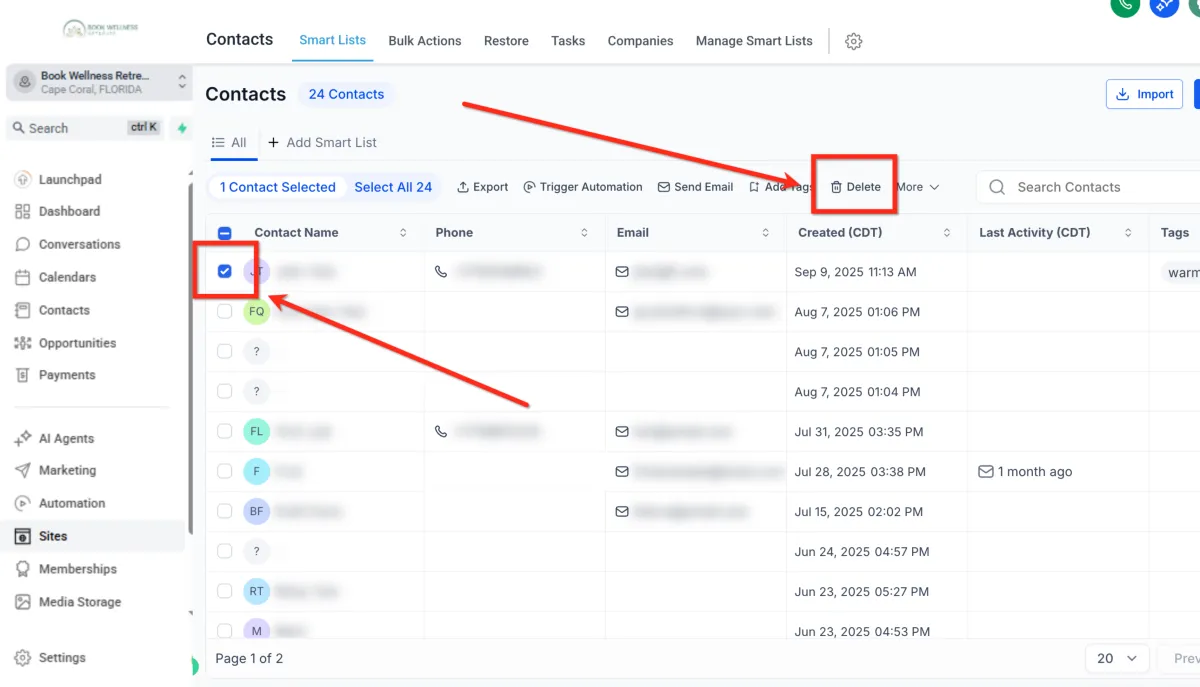
Follow these steps to delete a contact:
Navigate to Contacts in the main menu.

Select the contact you would like to delete using the checkbox to the left of the name. Then click the Delete button
Confirm for action by typing DELETE in the popup window. Then click the Delete button.
Create New Custom Fields
Custom fields allow you to tailor your contact database to fit your specific business requirements. Easily track the data that's most important to you and your team:
Navigate to Settings > Custom Fields..
2. Click Add Field.
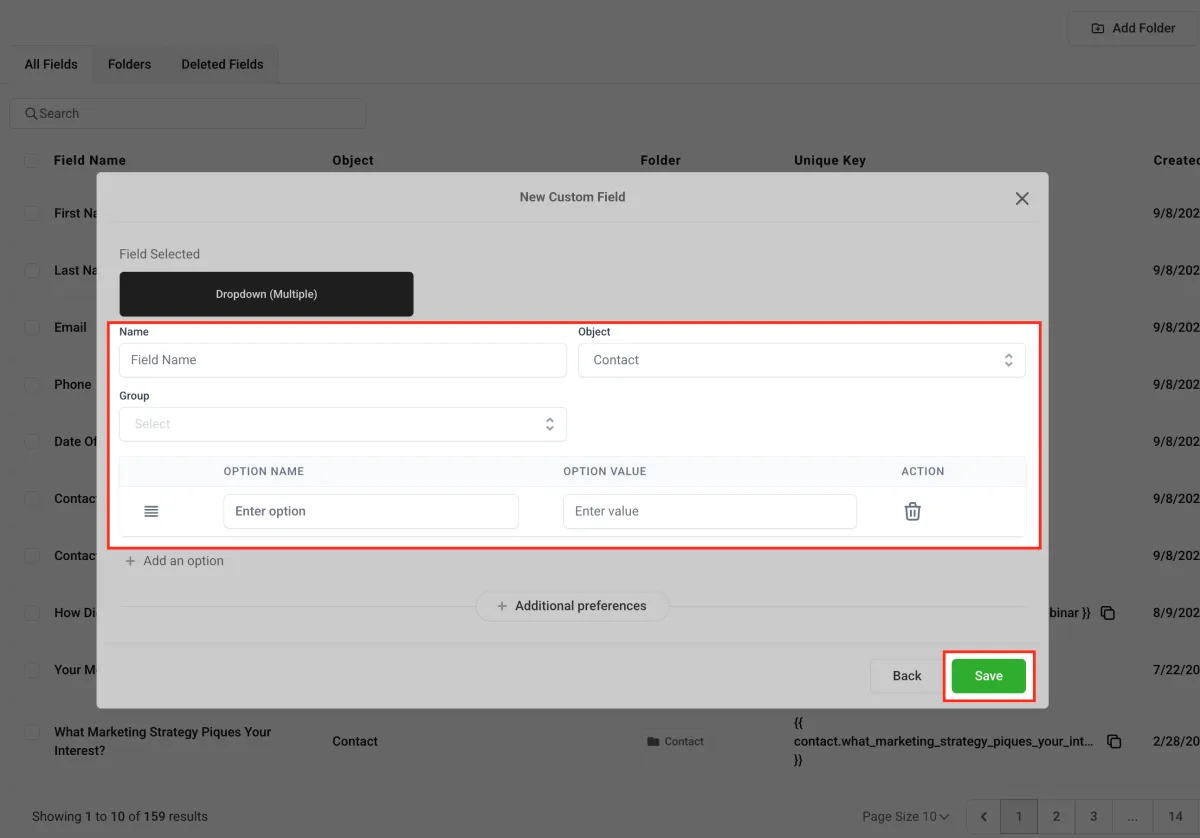
Choose the type of field you want to create (e.g., text, dropdown, date).
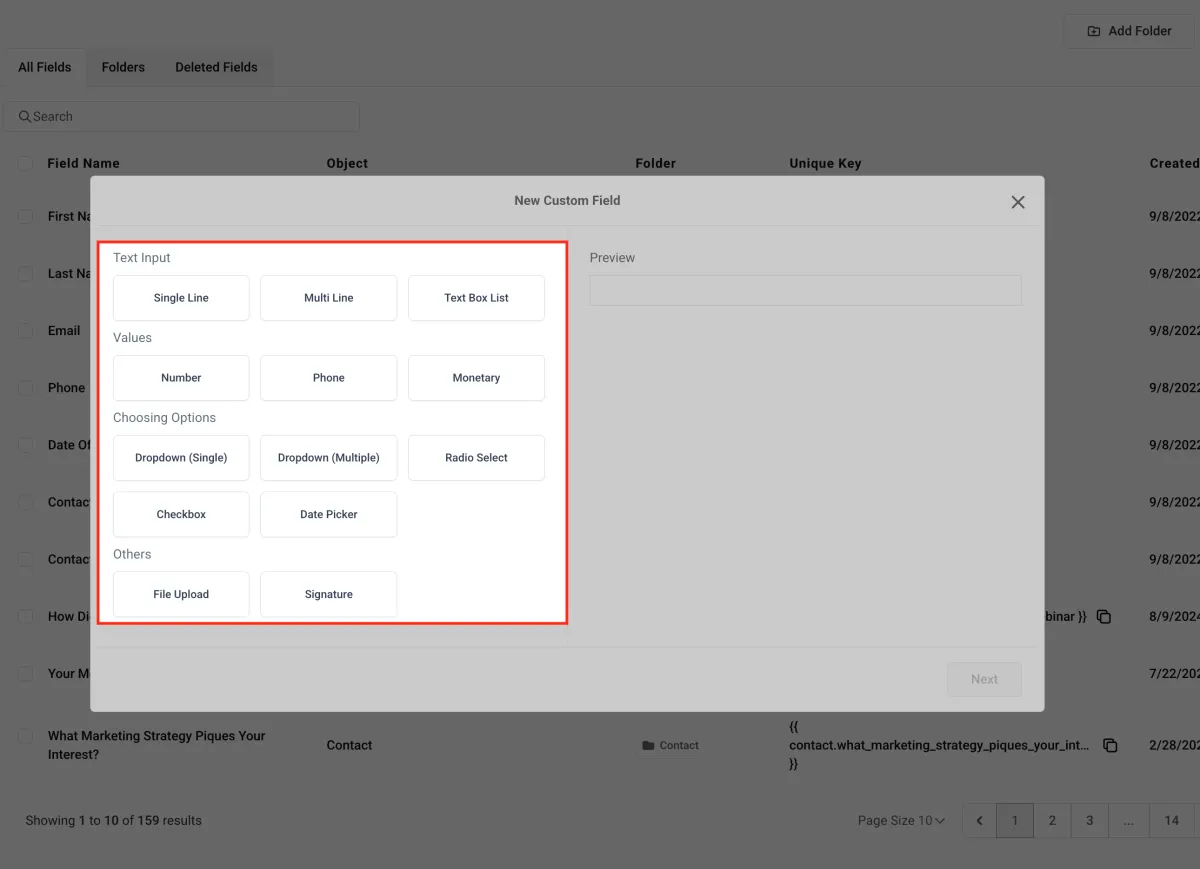
Complete the field details (name, group, placeholder, etc.). This helps ensure your team understands exactly what information is needed. Click Save.
Getting Started - Create a New Contact
TABLE OF CONTENTS
Still have questions? Contact [email protected]
Create New Contact
Let's dive right in by adding your very first contact. Establishing your network starts with this simple step:
Navigate to Contacts in the main menu.
Click the Add Contact button.
Enter the contact details (name, email, phone, etc.). Remember, the more information you provide, the easier it will be to personalize your engagements. If you don't see the contact field you need to add information to, use the Create New Custom Field checklist.
Click Save
Did you know? When a Form or Survey is filled out by a new lead, a new contact is automatically created!
Edit Existing Contact
Keep your contact information current and accurate. Editing contacts is quick and straightforward, ensuring your data stays up-to-date:
Navigate to Contacts in the main menu.
Click the Add Contact button.
3 Enter the contact details (name, email, phone, etc.). Remember, the more information you provide, the easier it will be to personalize your engagements. If you don't see the contact field you need to add information to, use the Create New Custom Field checklist.
Delete an Existing Contact
Deleting any contacts will also remove the corresponding: Conversations, Notes, Opportunities, Tasks, Appointments, Manual Actions, Community Group Owners. It will also stop any active campaigns and workflows for the contacts. Deleted contacts can be restored within 2 months
Follow these steps to delete a contact:
Navigate to Contacts in the main menu.
Select the contact you would like to delete using the checkbox to the left of the name. Then click the Delete button
Confirm for action by typing DELETE in the popup window. Then click the Delete button.
Create New Custom Fields
Custom fields allow you to tailor your contact database to fit your specific business requirements. Easily track the data that's most important to you and your team:
Navigate to Settings > Custom Fields..
2. Click Add Field.
Choose the type of field you want to create (e.g., text, dropdown, date).
Complete the field details (name, group, placeholder, etc.). This helps ensure your team understands exactly what information is needed. Click Save.
Ready to Transform Your Wellness Business?
Join hundreds of wellness leaders who are nurturing their retreat businesses with our gentle yet powerful platform

The complete platform for wellness entrepreneurs to design, grow, and run their business with purpose.
Platform
Marketing Services
Support
Copyright © 2025. Book Wellness Retreats LLC, All rights reserved
Ready to Transform Your Wellness Business?
Join hundreds of wellness leaders who are nurturing their retreat businesses with our gentle yet powerful platform
The complete platform for wellness entrepreneurs to design, grow, and run their business with purpose.
Platform
Marketing Services
Support
Copyright © 2025. Book Wellness Retreats LLC, All rights reserved