
Getting Started - Import Contacts
TABLE OF CONTENTS
Still have questions? Contact [email protected]
Import Contacts
Streamlining your outreach starts with importing your contacts. Follow these straightforward steps to ensure a smooth import:
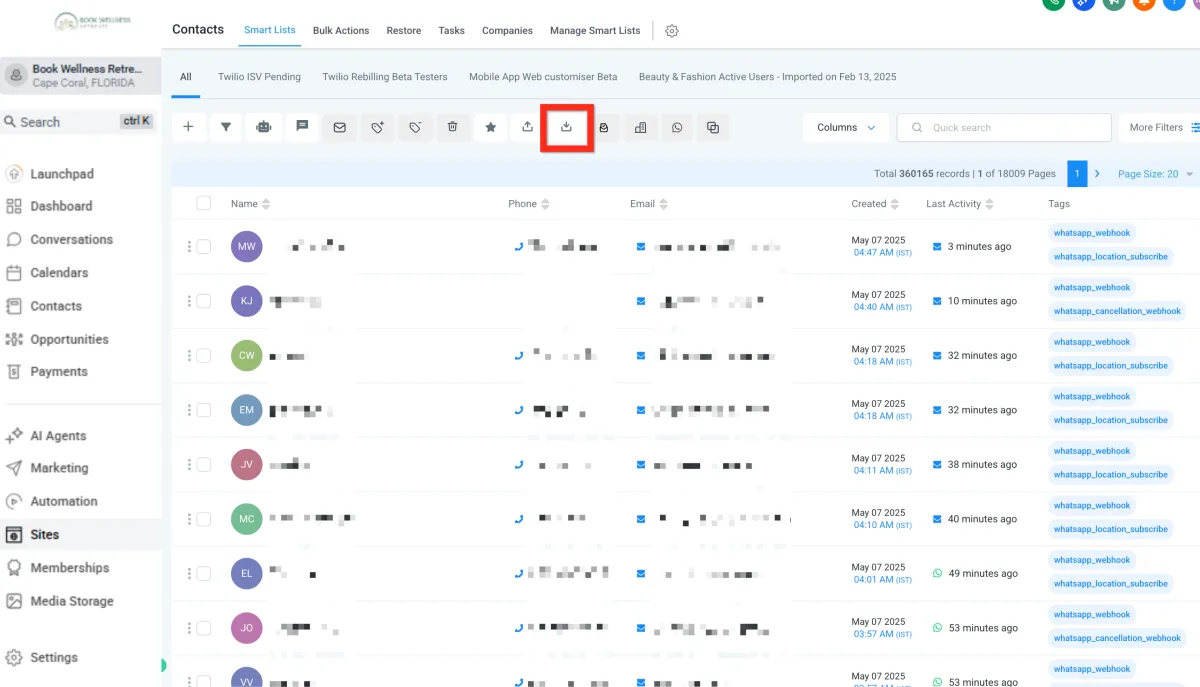
Navigate to Contacts.
Click Import Contacts (the icon looks like a downward arrow pointing into a box).
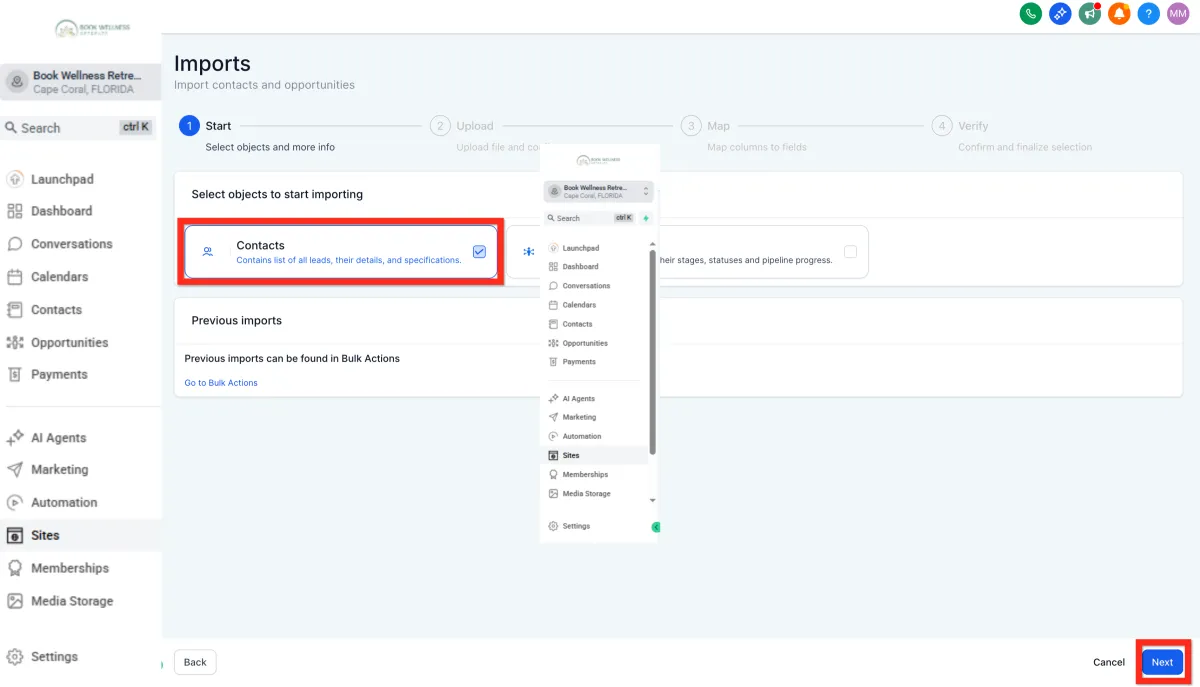
3. In Imports-1 Select Contacts and click Next
4. Confirm your file format.
5. Upload your file (CSV files up to 50MB).

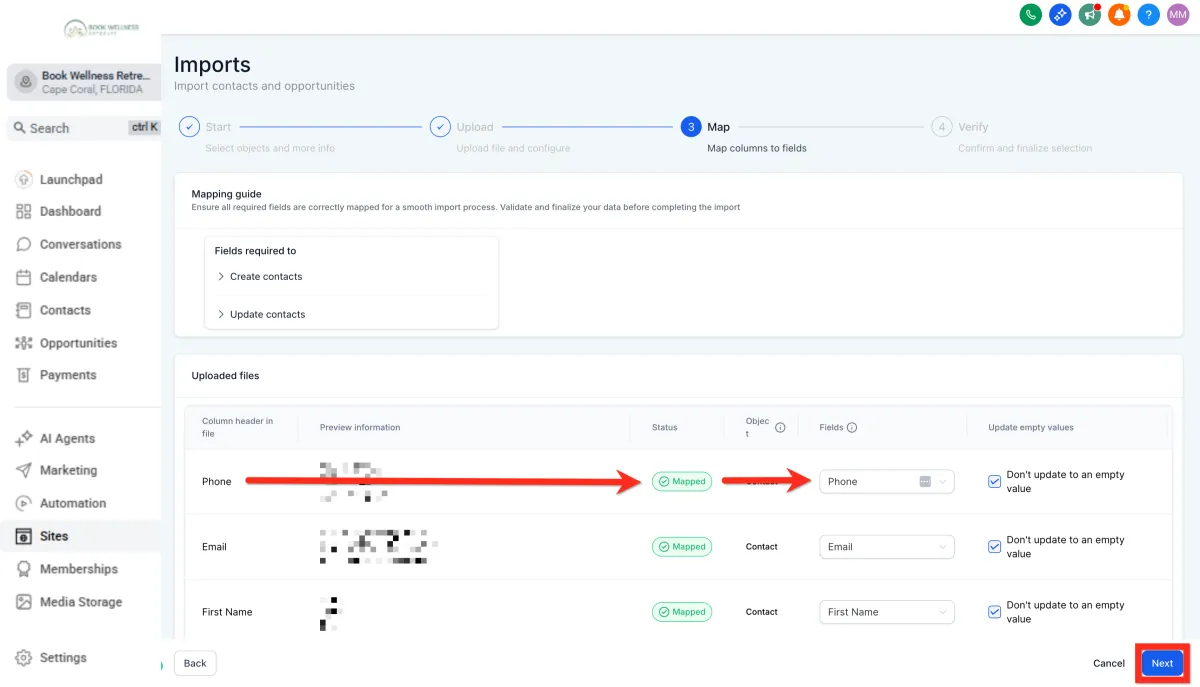
6. Map your file columns to corresponding Contact fields.
If you have non-standard data, create a new custom field.
Or select "Don't import data in unmatched columns".
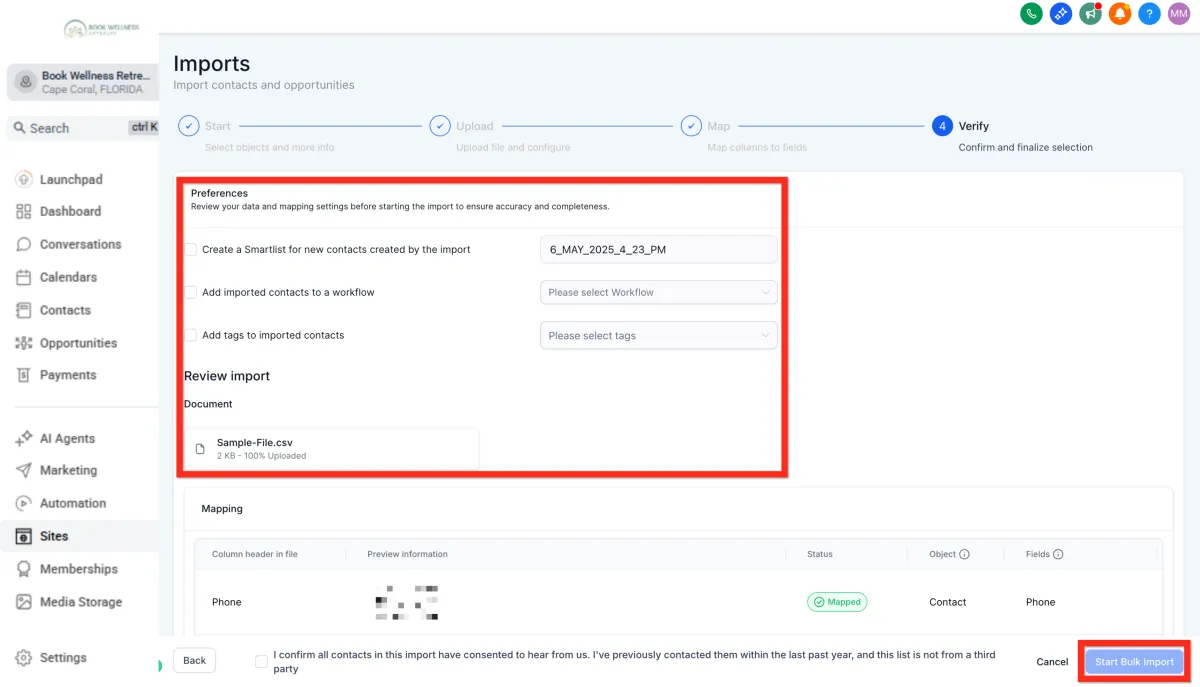
7. Fill in the import details (name your import, create lists, set consent preferences, etc.) and click Bulk Import.
8. Wait for the contacts to finish importing..
Create New Custom Fields
Personalize your contact data to match your unique business needs. Creating custom fields lets you capture exactly the information you find valuable, allowing for precise targeting and richer insights.
Here's how to set up your custom fields:
Navigate to Settings > Custom Fields.
Click Add Field.
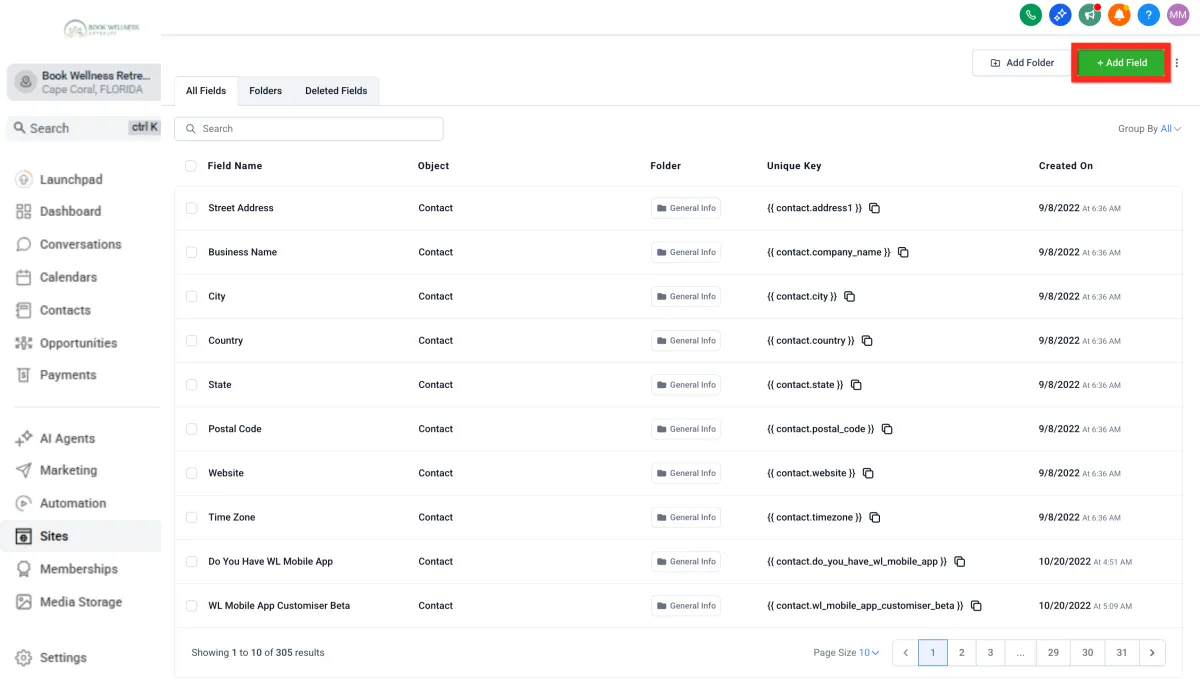
Select the type of field you need.
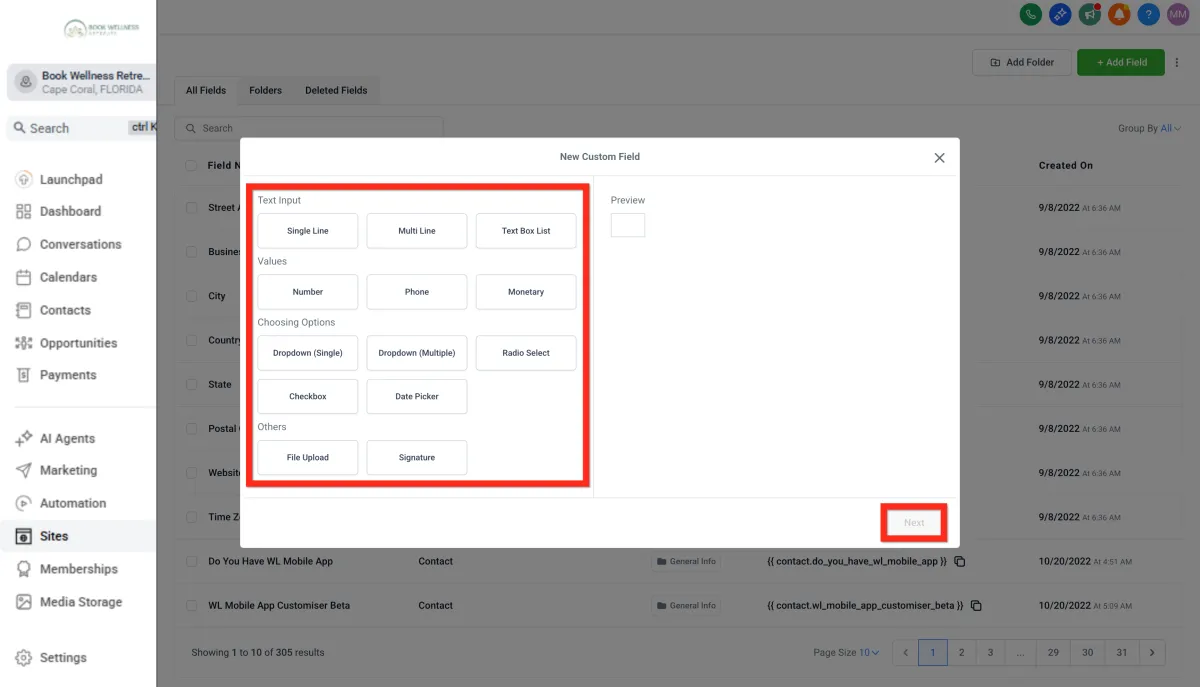
Fill in the field details (name, group, placeholder, etc.).
Click Save.
Bulk Contact Actions
Effortlessly manage large groups of contacts with powerful bulk actions. Whether you're adding tags, sending emails, or initiating automations, bulk actions save you time and amplify your efficiency.
Here's how you do it:
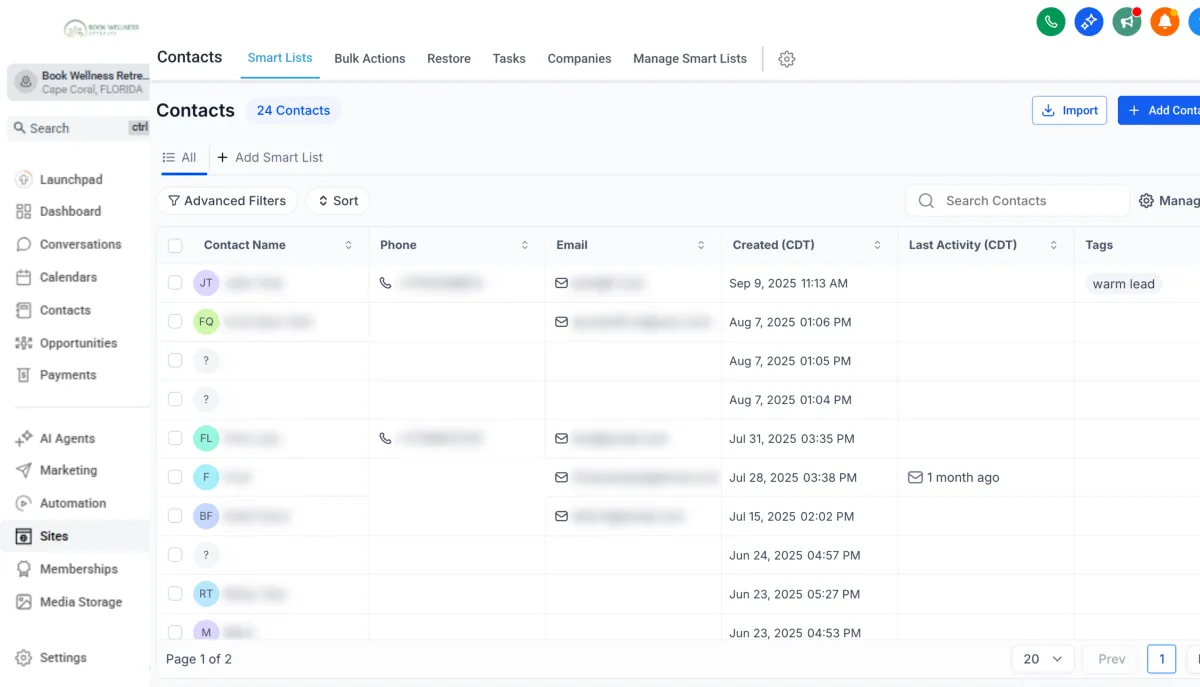
Navigate to Contacts.
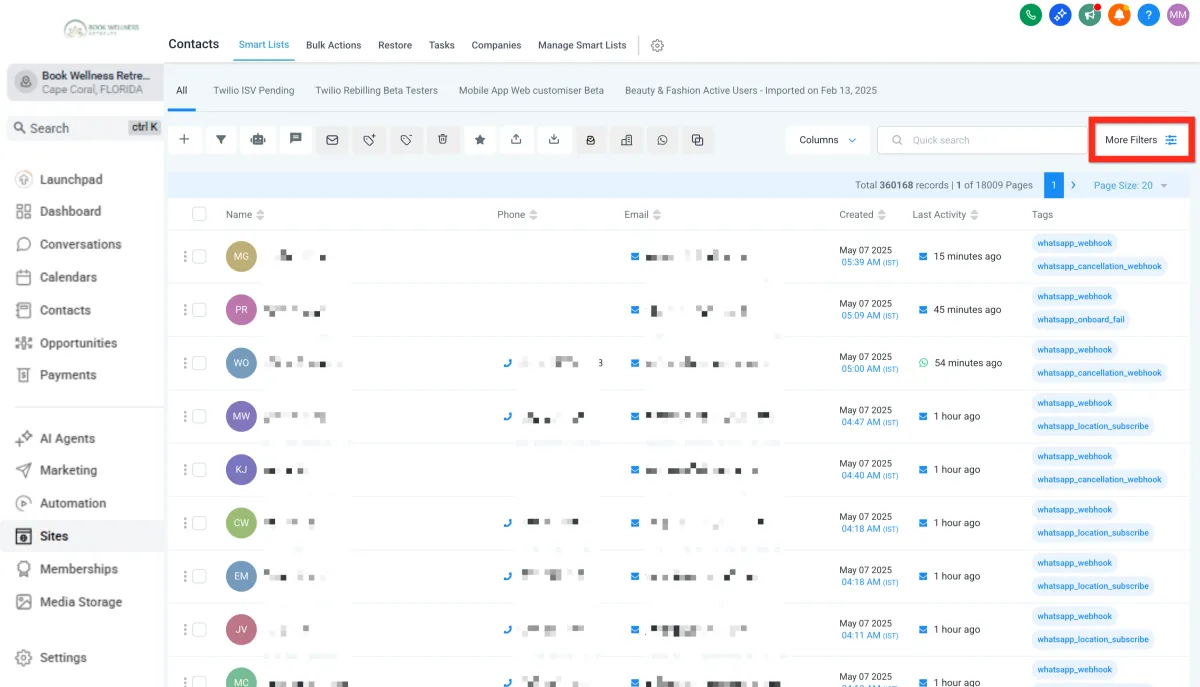
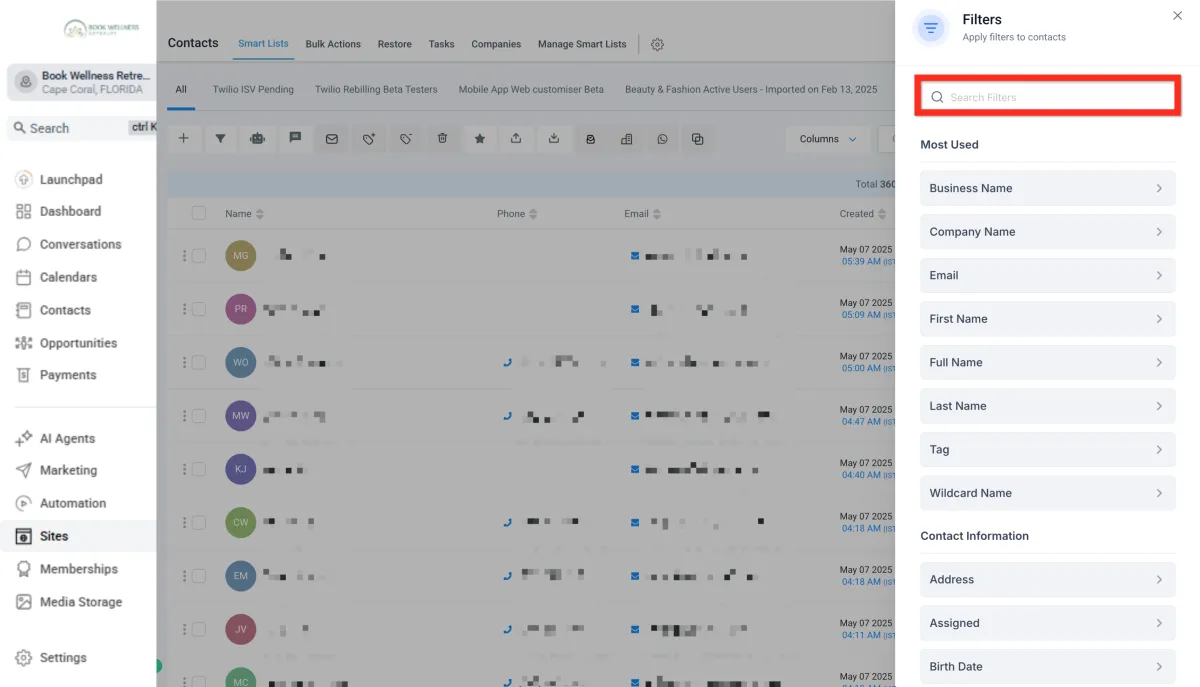
Apply filters to narrow down your audience.
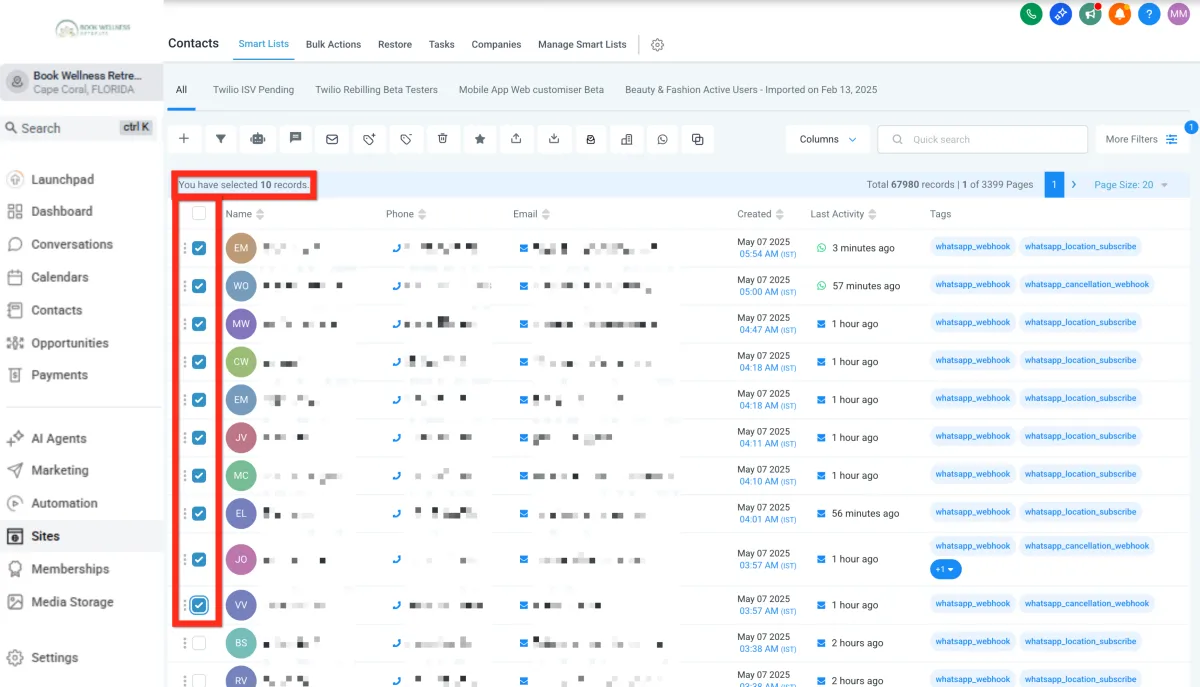
Select checkboxes next to your chosen contacts.
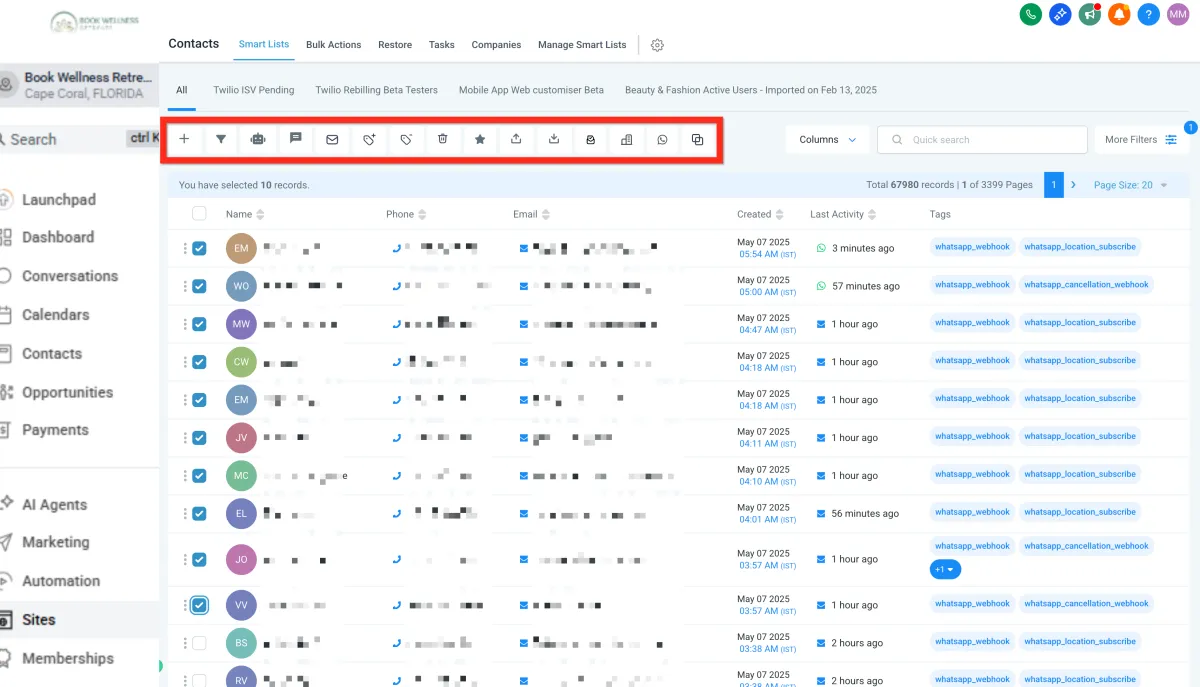
Click a bulk action button (e.g., Add to Automation, Send SMS, Send Email).
Getting Started - Import Contacts
TABLE OF CONTENTS
Still have questions? Contact [email protected]
Import Contacts
Streamlining your outreach starts with importing your contacts. Follow these straightforward steps to ensure a smooth import:
Navigate to Contacts.
Click Import Contacts (the icon looks like a downward arrow pointing into a box).
3. In Imports-1 Select Contacts and click Next
4. Confirm your file format.
5. Upload your file (CSV files up to 50MB).
6. Map your file columns to corresponding Contact fields.
If you have non-standard data, create a new custom field.
Or select "Don't import data in unmatched columns".
7. Fill in the import details (name your import, create lists, set consent preferences, etc.) and click Bulk Import.
8. Wait for the contacts to finish importing..
Create New Custom Fields
Personalize your contact data to match your unique business needs. Creating custom fields lets you capture exactly the information you find valuable, allowing for precise targeting and richer insights.
Here's how to set up your custom fields:
Navigate to Settings > Custom Fields.
Click Add Field.
Select the type of field you need.
Fill in the field details (name, group, placeholder, etc.).
Click Save.
Bulk Contact Actions
Effortlessly manage large groups of contacts with powerful bulk actions. Whether you're adding tags, sending emails, or initiating automations, bulk actions save you time and amplify your efficiency.
Here's how you do it:
Navigate to Contacts.
Apply filters to narrow down your audience.
Select checkboxes next to your chosen contacts.
Click a bulk action button (e.g., Add to Automation, Send SMS, Send Email).
Ready to Transform Your Wellness Business?
Join hundreds of wellness leaders who are nurturing their retreat businesses with our gentle yet powerful platform

The complete platform for wellness entrepreneurs to design, grow, and run their business with purpose.
Platform
Marketing Services
Support
Copyright © 2025. Book Wellness Retreats LLC, All rights reserved
Ready to Transform Your Wellness Business?
Join hundreds of wellness leaders who are nurturing their retreat businesses with our gentle yet powerful platform
The complete platform for wellness entrepreneurs to design, grow, and run their business with purpose.
Platform
Marketing Services
Support
Copyright © 2025. Book Wellness Retreats LLC, All rights reserved