
Getting Started - Sell Products
TABLE OF CONTENTS
Still have questions? Contact [email protected]
Create a Product
First things first, let's get your amazing product listed. Think of this like setting up your store shelves—you want everything clear, attractive, and inviting!
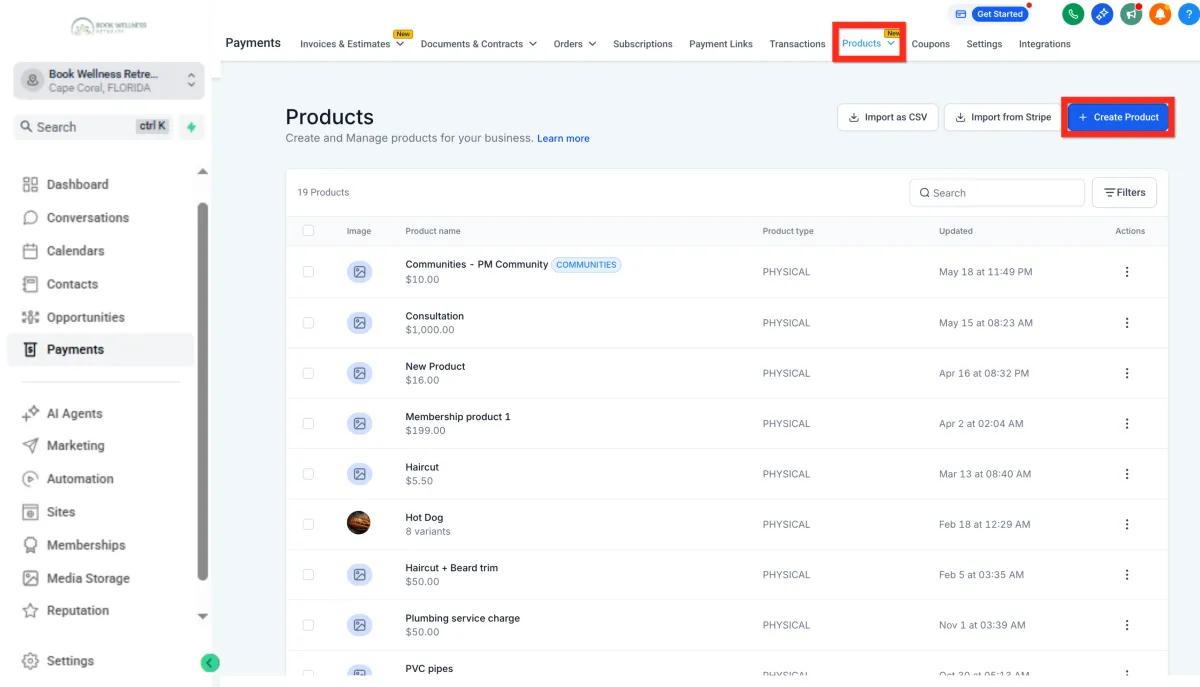
Navigate to Payments > Products.
Click Create Product.
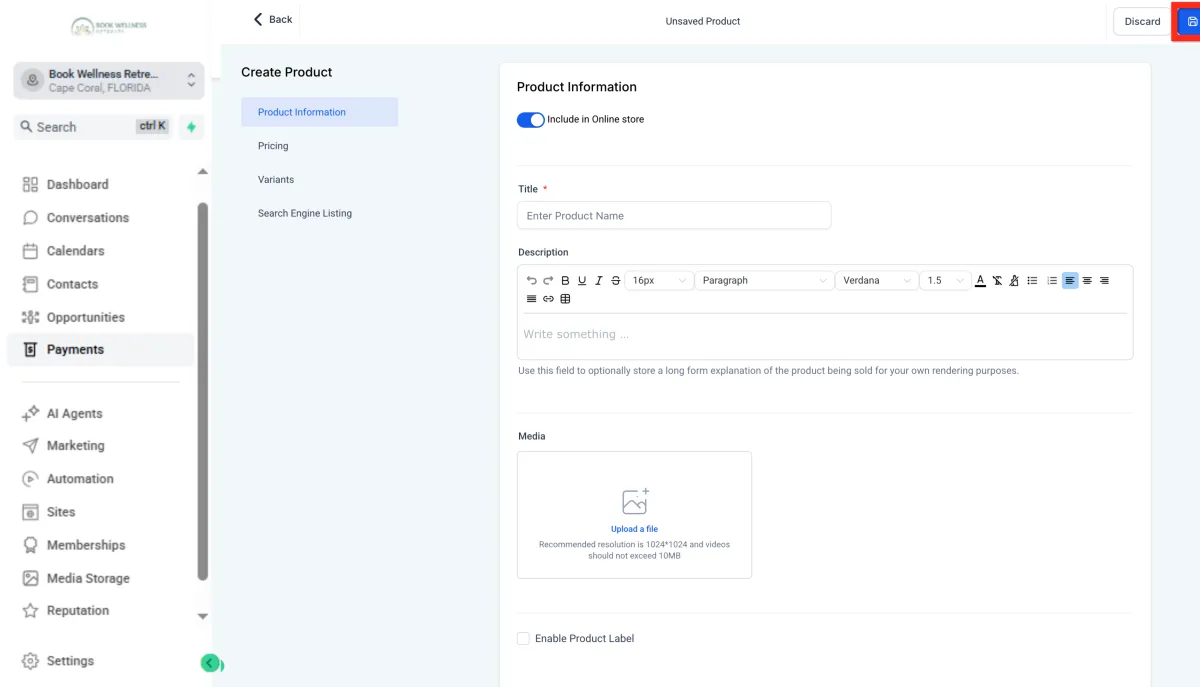
Fill out all the juicy details in the Product Editor (name, description, pricing, images, etc.).
Click Save.
Make Product Available
Great job creating your product! Now, let's make sure customers can actually find and buy it. Think of this step like stocking your storefront—visibility is everything!
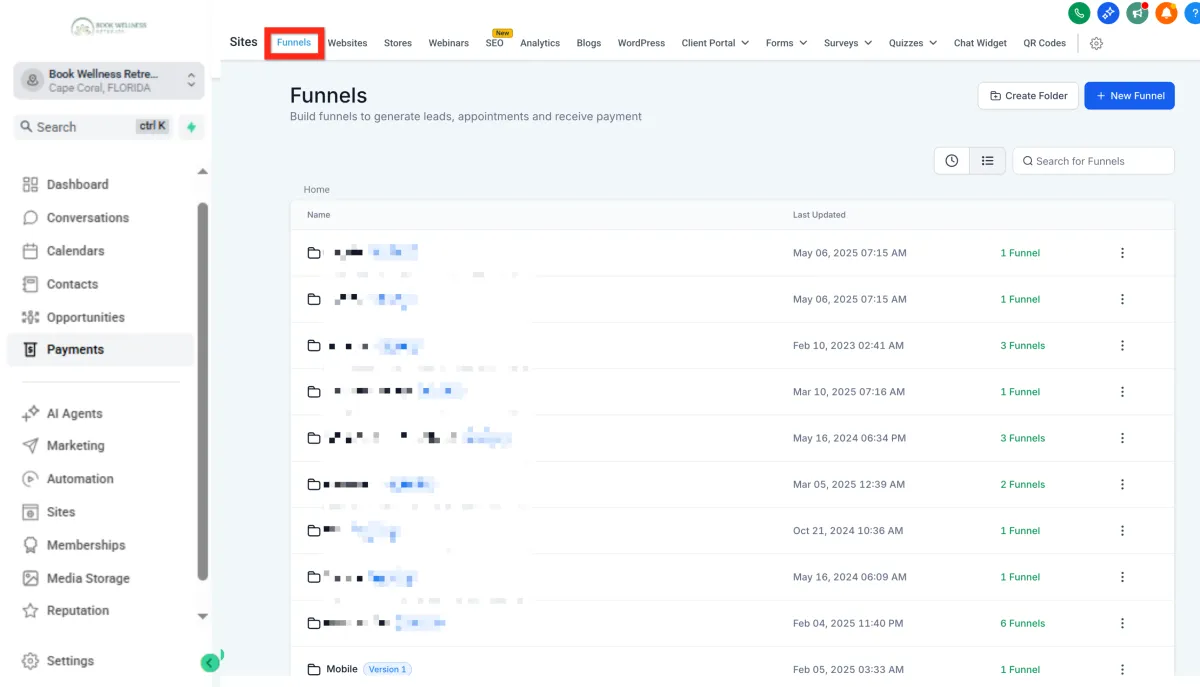
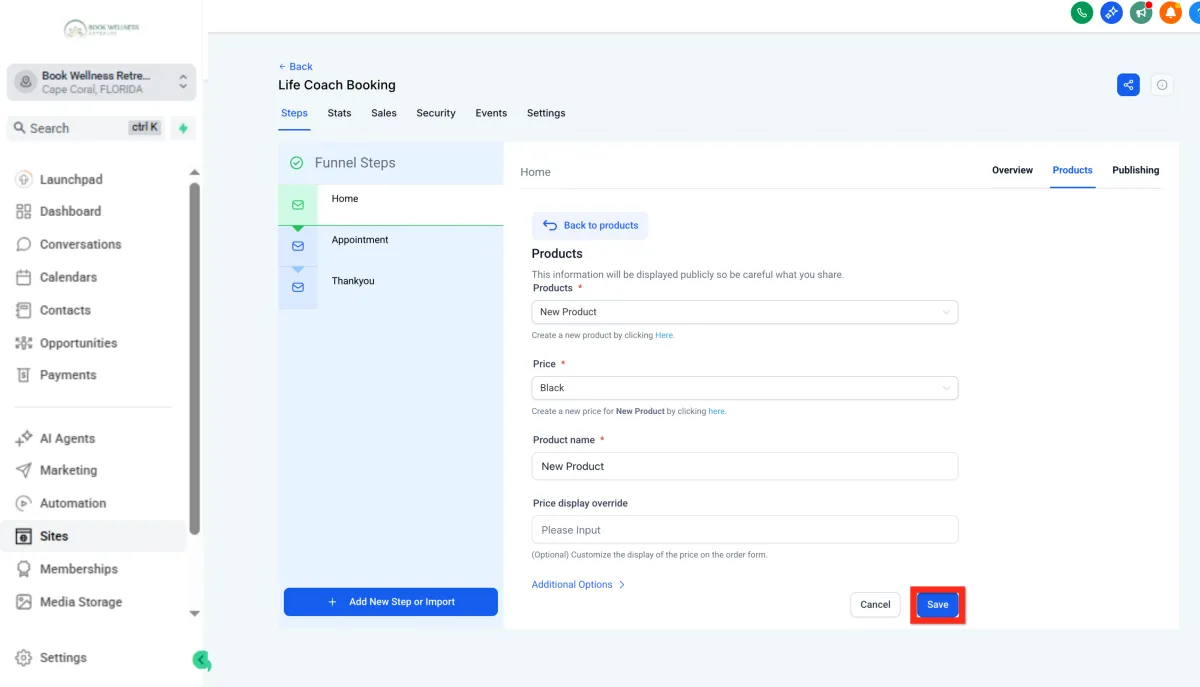
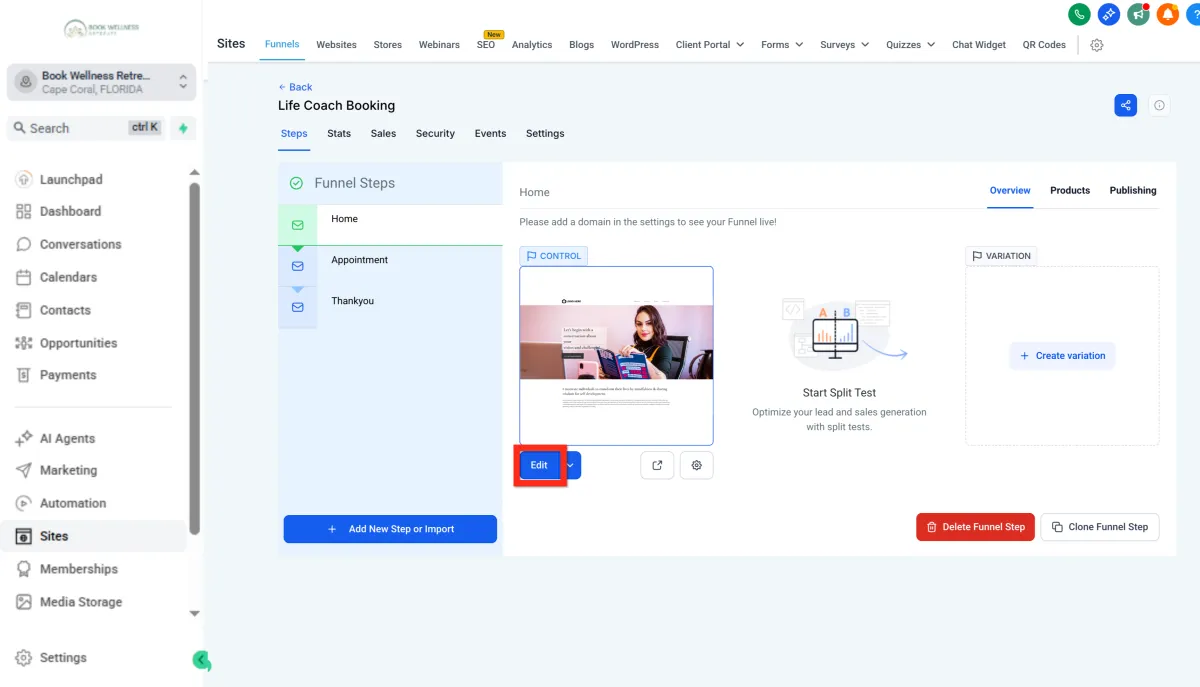
Navigate to Sites and choose where you want your product to appear: Website, Funnel, or Store.
For Funnels specifically:
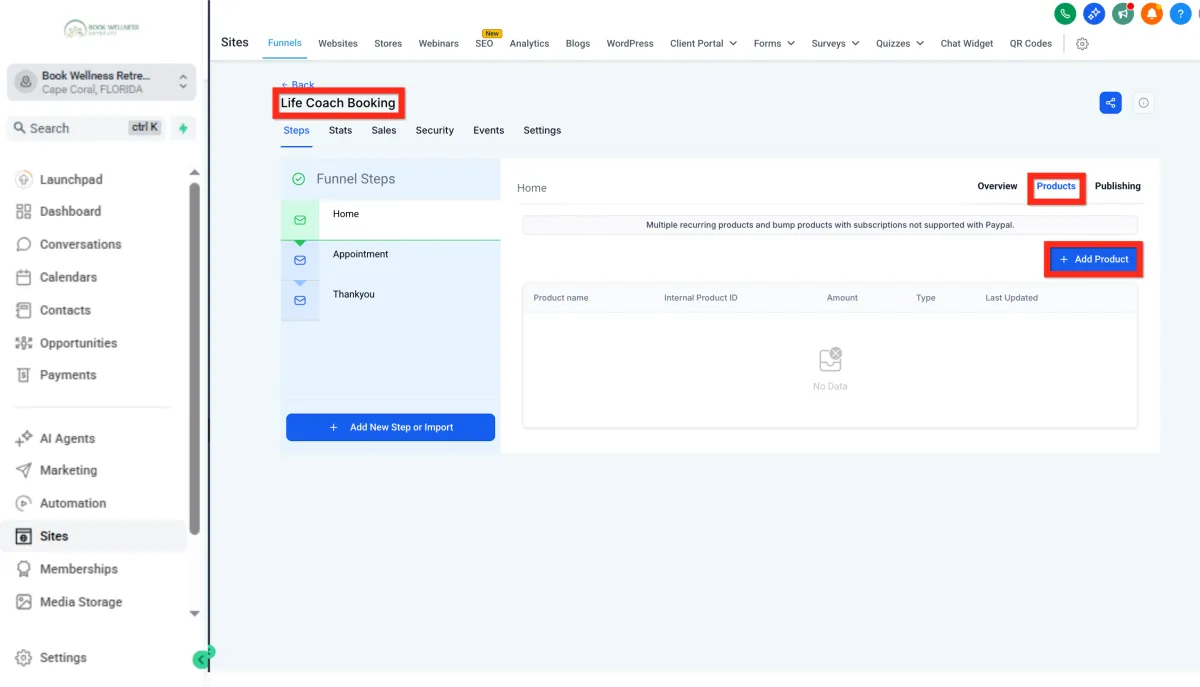
Click Funnels and select your desired funnel
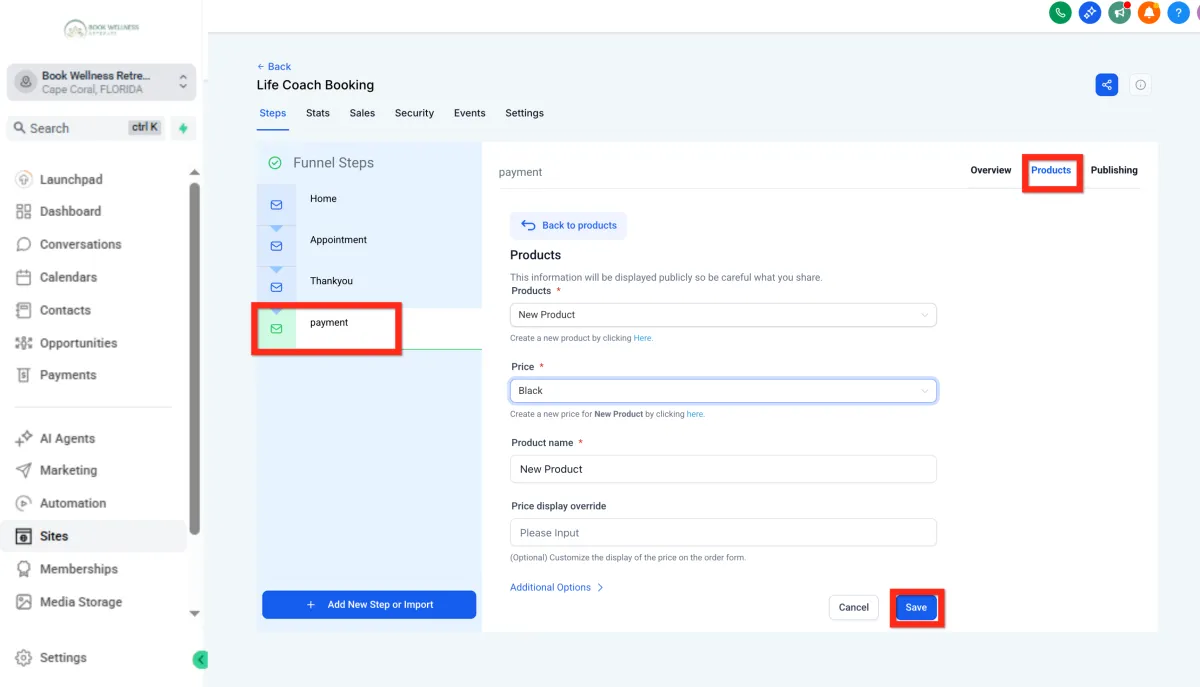
Go to the Products tab
Click Add Product
Configure your product details
Click Save
Awesome! Your product is now visible to customers. Next, you can boost your checkout experience with upsells or special offers.
Add Order Element
Alright, your product's ready and visible—now let's get the checkout process streamlined! Think of this step like opening the cash register—quick, easy, and secure.
Navigate to the Site Editor.
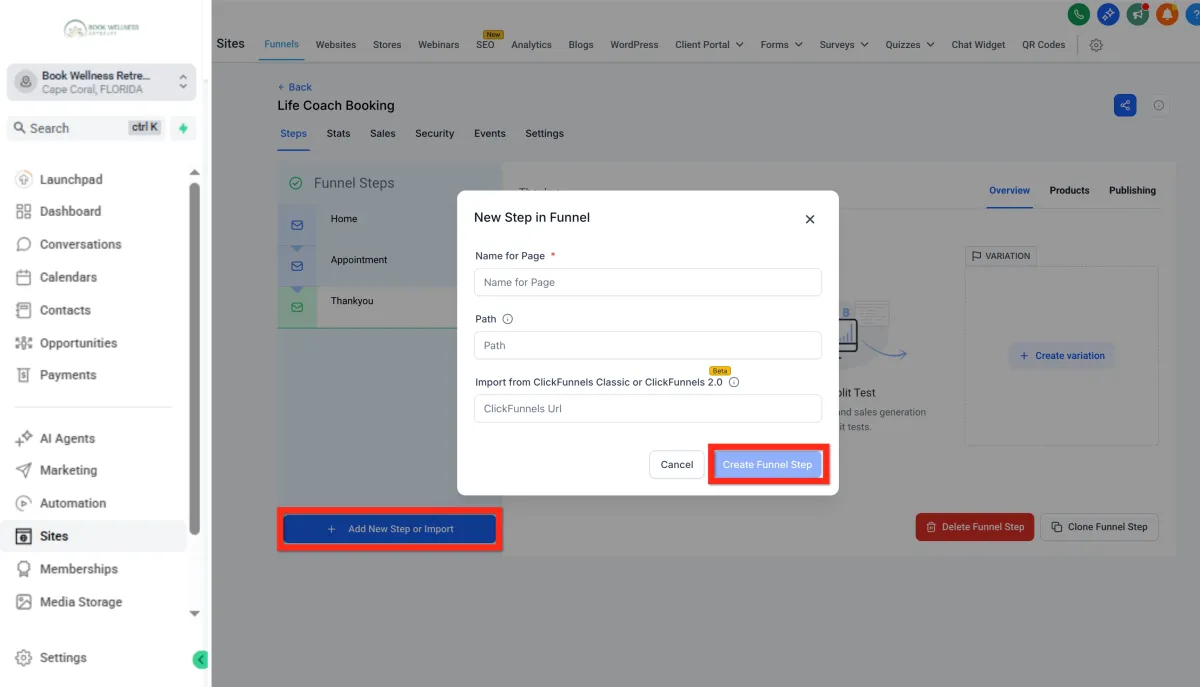
Select the funnel page that will have the checkout form. If that page doesn't exist yet, create it:
Click Add New Step.
Fill out the details and click Create Funnel Step.
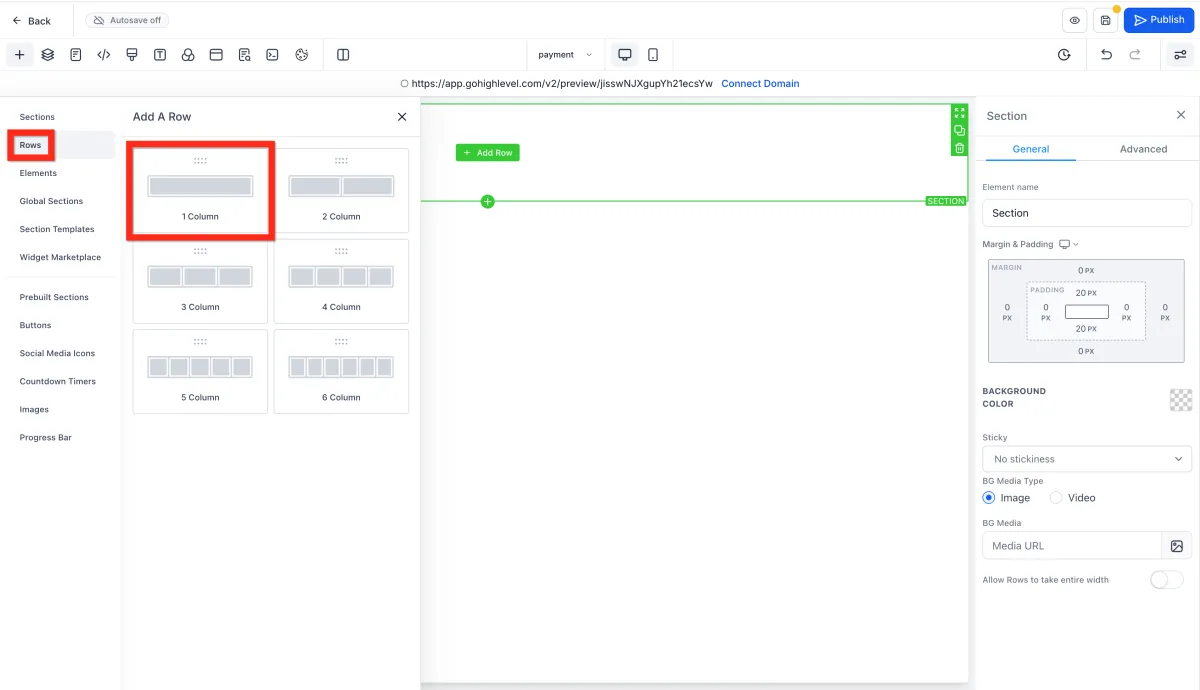
On the page, Add a full width section element.
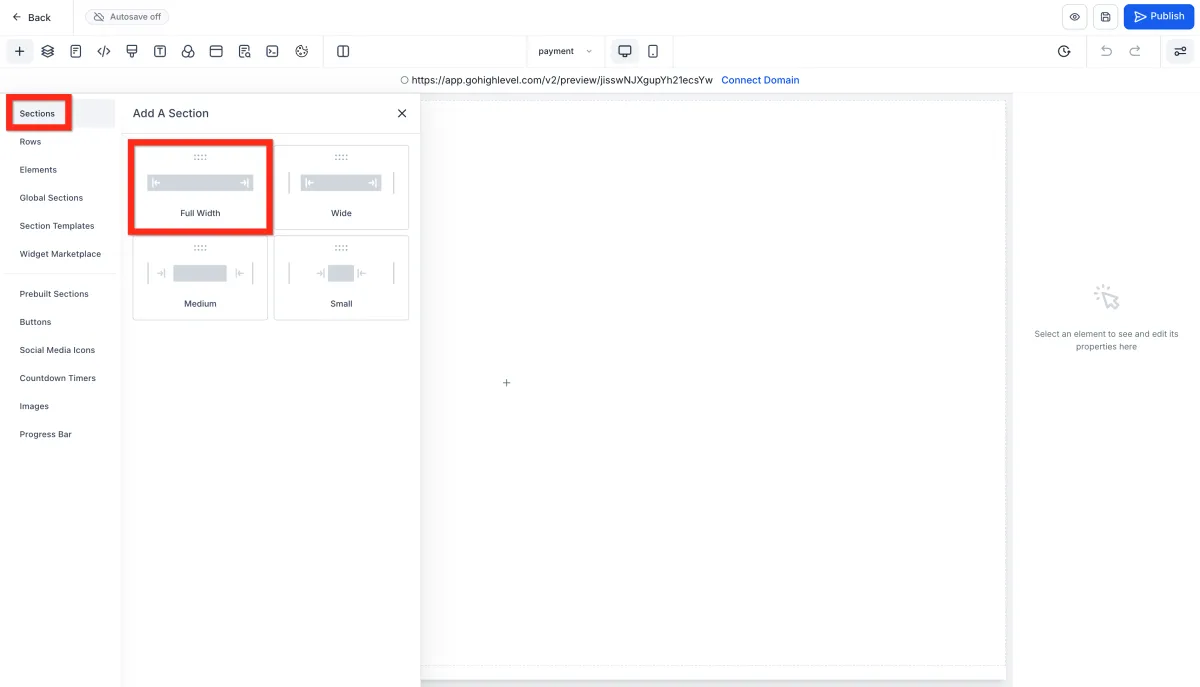
Inside the section, Add a one column row.
Inside the row, Add a one or two step order form.
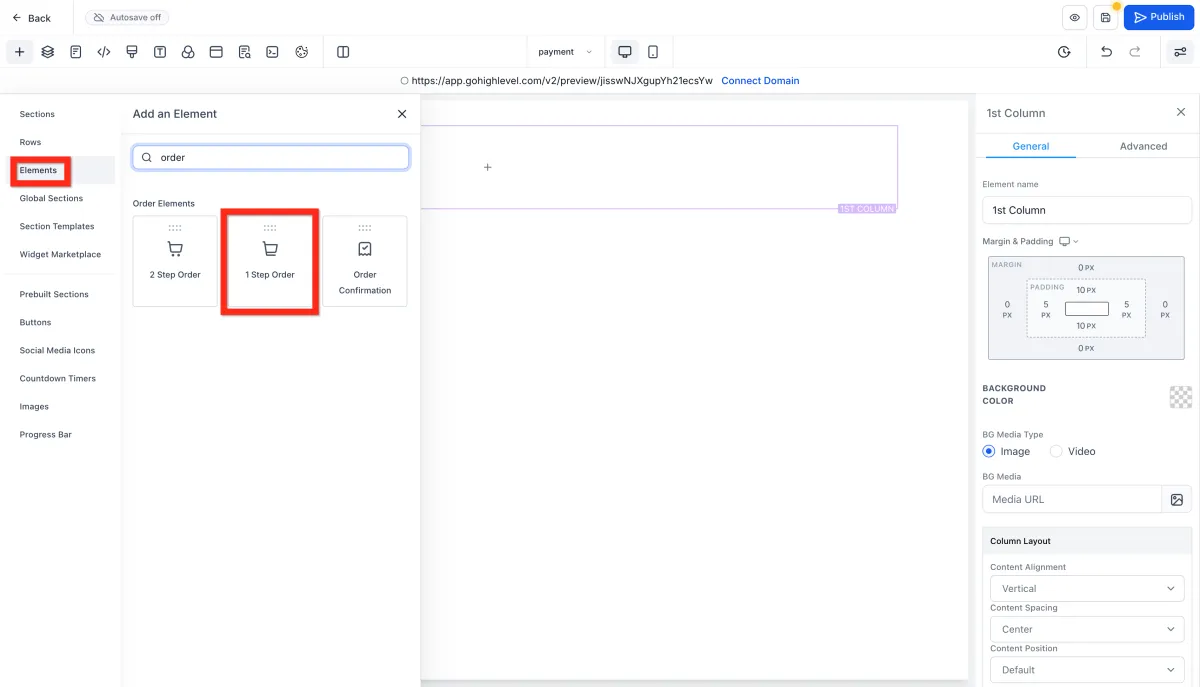
Customize the order form, then click Save and Publish.

Make sure the product is added to the same page as the order form.
Fantastic! Your customers can now smoothly complete their purchases. Next, why not experiment with sticky contact options to boost conversions?
Your funnel order form should look something like this:

Getting Started - Sell Products
TABLE OF CONTENTS
Still have questions? Contact [email protected]
Create a Product
First things first, let's get your amazing product listed. Think of this like setting up your store shelves—you want everything clear, attractive, and inviting!
Navigate to Payments > Products.
Click Create Product.
Fill out all the juicy details in the Product Editor (name, description, pricing, images, etc.)
Click Save..
Make Product Available
Great job creating your product! Now, let's make sure customers can actually find and buy it. Think of this step like stocking your storefront—visibility is everything!
Navigate to Sites and choose where you want your product to appear: Website, Funnel, or Store.
For Funnels specifically:
Click Funnels and select your desired funnel
Go to the Products tab
Click Add Product
Configure your product details
Click Save
Awesome! Your product is now visible to customers. Next, you can boost your checkout experience with upsells or special offers.
Add Order Element
Alright, your product's ready and visible—now let's get the checkout process streamlined! Think of this step like opening the cash register—quick, easy, and secure.
Navigate to the Site Editor.
Select the funnel page that will have the checkout form. If that page doesn't exist yet, create it:
Click Add New Step.
Fill out the details and click Create Funnel Step.
On the page, Add a full width section element.
Inside the section, Add a one column row.
Inside the row, Add a one or two step order form.
Customize the order form, then click Save and Publish.
Make sure the product is added to the same page as the order form.
Fantastic! Your customers can now smoothly complete their purchases. Next, why not experiment with sticky contact options to boost conversions?
Your funnel order form should look something like this:
Ready to Transform Your Wellness Business?
Join hundreds of wellness leaders who are nurturing their retreat businesses with our gentle yet powerful platform

The complete platform for wellness entrepreneurs to design, grow, and run their business with purpose.
Platform
Marketing Services
Support
Copyright © 2025. Book Wellness Retreats LLC, All rights reserved
Ready to Transform Your Wellness Business?
Join hundreds of wellness leaders who are nurturing their retreat businesses with our gentle yet powerful platform
The complete platform for wellness entrepreneurs to design, grow, and run their business with purpose.
Platform
Marketing Services
Support
Copyright © 2025. Book Wellness Retreats LLC, All rights reserved